Git Worktrees
Worktrees let you work on multiple branches of the same project at the same time — each in its own folder. CC Gate makes them easy to create and manage without using the terminal.
What's a worktree?
Normally, when you work on a project, you can only be on one branch at a time. If you want to switch branches, you have to stop what you're doing and switch over.
A worktree is a second (or third) copy of your project on a different branch, sitting in its own separate folder. Both copies exist at the same time. You can work in one while Claude Code works in the other — they won't interfere with each other.
This is especially useful when you want to run two Claude Code sessions on the same project. One can be polishing the main branch while another works on a new feature. No waiting, no branch switching.
Seeing your worktrees
Click the > arrow next to a project in the CC Gate popup to expand it. You'll see a list of active worktrees, each showing its branch name and last commit.
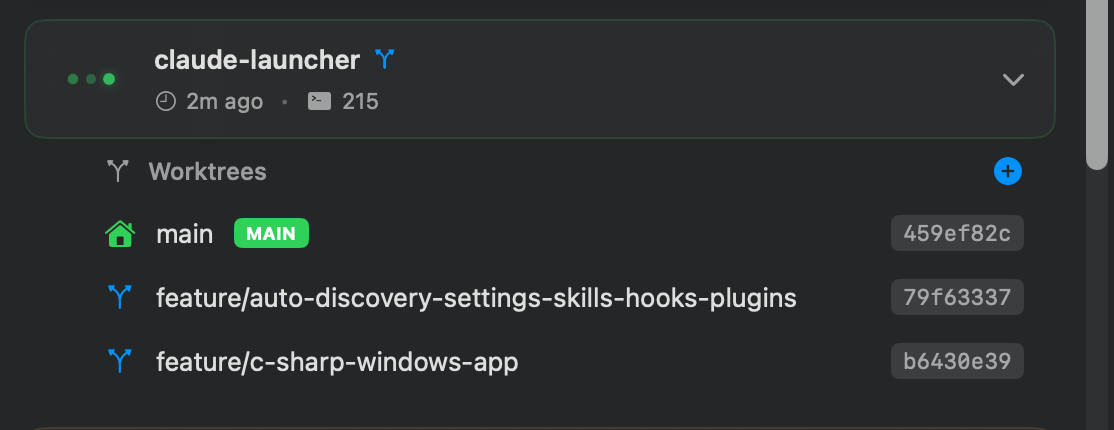
Each worktree row shows the branch it's on, a short commit ID so you can see where it is in history, and a status dot that reflects whether Claude Code is active in that folder.
Creating a worktree
- Click the > arrow on a project to expand it.
- Click the + button in the worktree section.
- Type a branch name — for example,
feature/dark-mode. - Choose what to base it on (usually main).
- Click Create.
CC Gate creates the new folder and checks out the branch for you. It opens automatically in your default editor.
feature/description or fix/issue-name. Keep them short and avoid spaces — the branch name becomes the folder name.
Right-click menu
Right-click any worktree row to open a menu with everything you need:
CC Gate only shows the editors and terminals that are actually installed on your Mac.
Committing changes
When a worktree has unsaved changes, you can commit them right from CC Gate — no terminal needed.
- Right-click the worktree and choose Commit Changes...
- A panel opens showing what changed.
- If you have AI Commits turned on, CC Gate writes the commit message for you automatically.
- Read the message, edit it if you want, then click Commit.
Merging back to main
When your work is ready to go into the main branch:
- Make sure all your changes are committed first (no unsaved changes).
- Right-click the worktree and choose Merge to main...
- Review the summary and click Merge.
Deleting a worktree
- Right-click the worktree and choose Delete Worktree...
- Confirm in the dialog that appears.
This removes the folder from your Mac. Your branch history stays in git — you haven't lost any committed work. Only uncommitted changes in that folder would be gone, so make sure you've committed everything you want to keep before deleting.
Troubleshooting
Worktree won't delete
Make sure all files in that worktree are committed or stashed first. If the folder was deleted manually outside of CC Gate, use the Git Health check (right-click the project card) to clean up the leftover reference.
Merge conflict
Open the project in your editor. Look for sections marked with conflict indicators, fix them, then commit the changes. After that, the merge can proceed.
Branch already exists
Choose a different name when creating the worktree. Every worktree needs a unique branch name.
Worktree not showing up
CC Gate checks for worktrees on each refresh. Wait a few seconds, or increase the refresh rate in Settings → General if you need faster updates.